Commercial smart pool automation systems can cost upwards of $10,000, with simple hardware alone running $1,500-$3,000. Our DIY pool automation approach offers a much more affordable alternative that won’t break the bank. You can build a complete system for under $300 instead of spending thousands.
Pool automation transforms your swimming pool into a smart, efficient system that’s easier to maintain and more enjoyable. Most people need professional help and a big investment for traditional automation installation. Our DIY method makes the process simpler while cutting costs dramatically. You can save over 90% compared to commercial options that cost $5,000 to $10,000 for hardware and installation. On top of that, we’ll guide you through each step to create your custom setup – from picking components to setting up remote control through the user-friendly interface.
Planning Your DIY Pool Automation System
A well-laid-out plan is key to building a DIY pool automation system that works. You need clear goals before buying components or writing code.
Set your automation goals
The reasons for automating your pool matter. You might want to spend less time on maintenance. Better water quality and preventing green water could be priorities. Safety concerns about dangerous chemicals near kids and pets might drive your decision. Clear goals will help you pick the right parts and features without wasting money.
Decide what features to control
Your system’s features should match your goals. Common automation targets are:
- Pumps and filtration schedules
- Water temperature regulation
- Lighting systems
- Chemical management
- Water features (jets, waterfalls)
- Safety monitoring
More features mean more circuits in your control center, which affects the cost. You can start with basic functions and add more later.
Sketch a wiring and layout plan
A detailed setup plan shows where parts go and how they connect. Outdoor setups need weatherproofing with appropriate enclosures. Your pool system’s voltage needs vary:
- 120v/240v for pumps, chlorinators, and heaters
- 24v AC for valve actuators and some lighting
- 5v/12v DC for controllers and LED lighting
Drawing a floor plan helps visualize the setup and leaves room for maintenance access.
Choose between Raspberry Pi and ESP32
Your system’s brain is the last planning choice. The Raspberry Pi offers more computing power and runs a full operating system. This makes it great for web interfaces and managing databases. The ESP32 costs less and excels at live control. It uses less power and comes with WiFi and Bluetooth built in. Both work well for most DIY pool projects. Your technical skills and wanted features should guide this choice.
Essential Components to Build Your System Under $300
Building a DIY pool automation system needs several affordable components that work together to create a smart swimming experience. The essential parts needed to stay under the $300 budget are listed below.
1. Microcontroller (Raspberry Pi or ESP32)
The ESP32 makes an excellent choice for pool automation with its increased memory and numerous GPIO pins. This microcontroller acts as your system’s brain that processes sensor inputs and controls pool equipment through programming.
2. Relay modules for switching devices
An eight-channel relay board creates your control system’s core and lets you turn pool equipment on and off. High-power applications like pumps need 40-amp contactors or relays to handle the electrical load.
3. Power supplies and transformers
Your system needs multiple voltage types: 5V DC for the controller, 12V DC for LED switches, 24V AC for valve actuators, and 110V AC for pumps and lights. UL 379 Listed power supplies designed for pool applications ensure safety and code compliance.
4. Temperature and water level sensors
Standard 10k-ohm thermistor-style temperature sensors track water, air, and solar heating conditions. These sensors feed data to automated heating control, freeze protection, and system monitoring.
5. Waterproof enclosures and cable glands
A NEMA-rated waterproof enclosure (IP67 or better) protects your outdoor electronics near water. These protective cases keep sensitive components safe from moisture, dust, and environmental hazards.
6. Valve actuators for water flow control
Motorized 24V AC valve actuators manage water flow between pool features and cost around $88 each. They redirect water to spas, waterfalls, or other features based on your programmed settings.
7. LED lighting and controllers
LED lighting controllers handle pool illumination with functions like on/off control, brightness adjustment, and color changing. Modern controllers connect to smartphones for remote operation.
8. Wi-Fi or mobile access setup
Your ESP32’s built-in WiFi enables remote control capabilities. A repurposed tablet ($90) mounted by your pool equipment provides an easy way to manage the system.
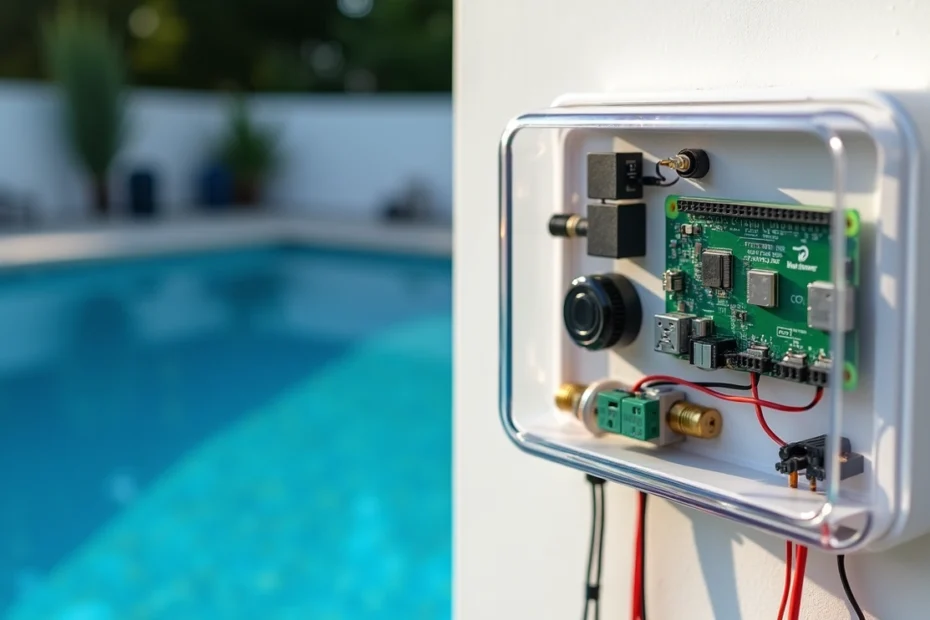
Wiring and Assembling the Hardware Safely
Safety comes first! You need proper installation techniques to prevent shock hazards and equipment damage while working with electrical components near water.
Mount and protect your controller
A waterproof NEMA-rated enclosure is a vital part of outdoor installations. I mount my controller on a metal backplane that can be grounded properly to give additional protection. The enclosure’s conduit knockouts should point downward to stop water from getting in.
Connect relays to pumps and lights
High-voltage equipment like pool pumps (240V) needs dedicated 40-amp contactors or relays. You must turn off the power at the circuit breaker and check with a voltmeter before making any connections. The lights should be connected in series with the existing switches to give you flexibility.
Wire sensors for temperature and flow
You should install temperature sensors between the pump and filter, before the heater. The flow sensors need to point with their directional arrow facing the water flow.
Ensure voltage separation and safety
High and low voltage wires should never share the same conduit. On top of that, it’s mandatory to bond all equipment with a #8 AWG solid copper wire.
Test each component before sealing
I test each connection individually before final assembly. This step-by-step approach will give a fully working system before weatherproofing.
Programming and Remote Control Features
The hardware assembly is complete. Let’s bring your DIY pool automation system to life with programming.
Use Python or Tasmota for automation
Python gives you great flexibility with Raspberry Pi-based systems, especially when you have web interfaces and database needs. Tasmota firmware excels on ESP8266/ESP32 devices and comes with built-in support for MQTT, HTTP, and serial protocols. You can control relays, sensors, and pool functions directly with this firmware without deep coding knowledge.
Create macros for one-click control
Macros (also called “scenes”) make pool operation simple by combining multiple actions into a single command. To name just one example, a “Pool Party” macro could activate filtration, set specific lighting, and turn on water features at once. You can set these up in Tasmota by subscribing to MQTT topics that run predefined functions on trigger.
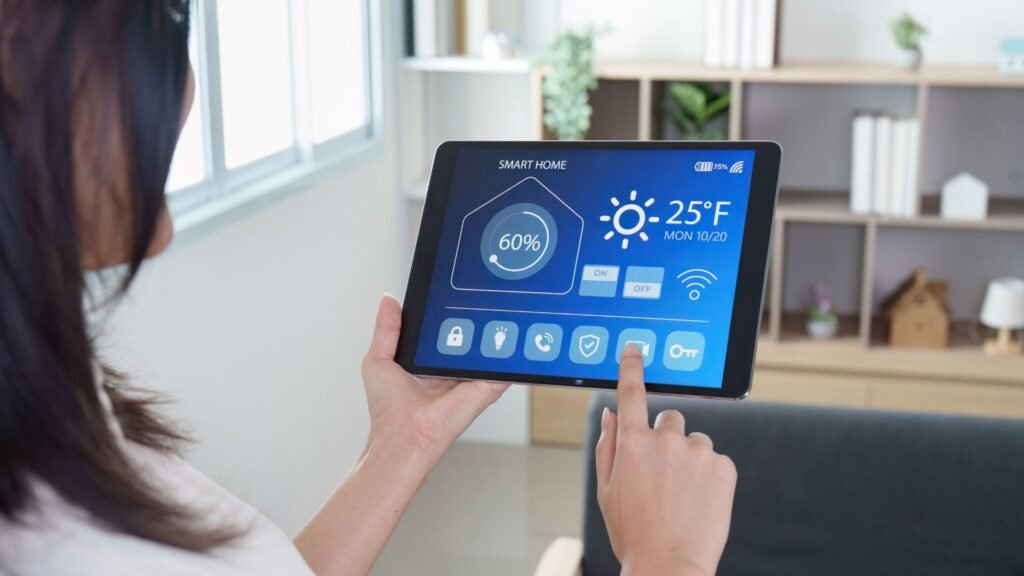
Set up mobile or web access
The iAquaLink app shows one way to control your pool from mobile devices. You can manage pumps, temperatures, and lighting from any location. Notwithstanding that, DIY systems with a simple web interface built through Python or Flutter are available from any browser.
Optional: Integrate with Alexa or Google Home
Voice control makes your pool automation system more convenient. Both Alexa and Google Home work well with custom pool controllers. You can activate the spa, adjust lighting, or check water temperature with simple voice commands.
Conclusion
Smart, efficient systems can transform ordinary swimming pools without breaking the bank. You can build your own system for under $300 and save money compared to commercial options that cost thousands. This approach makes advanced pool technology accessible to most homeowners.
The project follows a logical path from planning to programming. Clear automation goals help select the right components. Hardware assembly needs proper safety measures to work reliably. Programming creates a custom experience that matches your specific needs.
Safety should be your top priority throughout this project. Waterproof enclosures, proper voltage separation, and adequate grounding protect your equipment and family. Testing everything before final assembly prevents problems later.
DIY automation’s beauty comes from its flexibility and room for growth. Starting with simple functions like pump control and temperature monitoring makes sense. You can add more advanced features as your budget allows. Your pool system grows with your technology comfort level.
Automation saves time and money quickly, which justifies your original investment. You’ll spend less time on manual maintenance and more time enjoying your pool. Remote control features let you manage everything from anywhere through a dedicated app, web interface, or maybe even voice commands.
DIY pool automation ended up striking the perfect balance between economical solutions and functionality. Building something yourself brings satisfaction, and automated pool management adds daily convenience. This makes the whole ordeal worthwhile for any pool owner. Your future self will thank you while relaxing in your perfectly managed, effortlessly controlled swimming pool.